This blog post contains research on a bunch of typefaces and title ideas for our movie opening scene project. This blog post was done by my team member, Kristine, however I slightly changed her words into my own.
Examples I liked₊˚ʚ ᗢ₊˚✧ ゚
1. [⏺REC]
I liked this idea because the font and style of the text looks slightly different from other found footage titles, making it unique and special. The red dot and bracket basically gives the reader an impression that the movie is like a recording, so the audience knows it is a found footage film. In the second version, the blood splatters gives the audience an idea that the movie is going to involve sensitive topics such as murder, death, or gore. However, this title card was shown at the end because the filmmaker wanted to keep it realistic while still adding the title.
2. The Blair Witch Project
The opening scene was very short because the title card appeared before the movie started. In found footage films, an opening scene is not always necessary in order to keep it realistic. I like how the title was really simple (like a normal text) but it had strong reasons behind it. Using a small title makes the audience feel like they are watching raw, unedited footage, which helps keep the film immersive.
3. Grave Encounters
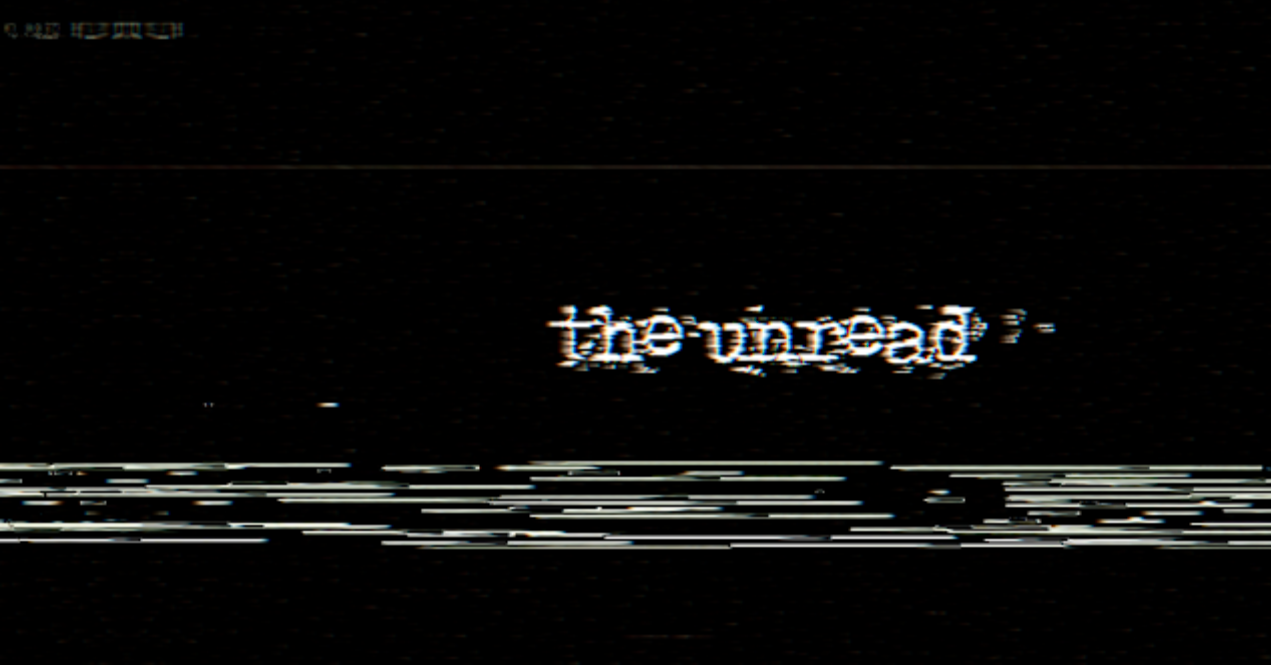
In my opinion, this was a clever way to add a title card because it didn’t really feel like one. What's particularly good about it is its font, because it stands out from other found footage movies. This is due to its distorted look, which gives off an uneasy feeling, such as paranoia or hallucination.
4. Cloverfield
This title card is really interesting because they purposely made it look like it came straight out of a camera (the timestamp and font). We could use this as an inspiration to help make our film feel more realistic. I like how the editor used different tech-style fonts to give the reader an impression that they're watching a video recording from a camera.
5. Spree
This is actually similar to Grave Encounters, where the title card was hidden in the scene to keep it realistic. I think this opening scene is really cool and smooth because of how the transition was done (the app's name that was featured in the movie is also the movie's title). This serves as an inspiration to us because we could use the book’s title as our title card. I also like the simple, clean font with a red title, which gives off an eerie feeling, as the color red symbolizes danger.
Credit/names˖ . ݁✶⋆.˚
Starring:
1. Drew: Panji Wiradharma
2. Carrie: Kellie Collins
3. Lyla: Lamiya Zara
Editor:
1. Maisie Halomoan
Director:
1. Kristine Lambert
Why we might NOT add credits:
In a lot of cases, found footage films don't usually have opening credits in order to keep them realistic. Since we wanted the same style, we decided not to include any credits at the start. Adding them would break the immersive feeling towards the audience and make it feel less realistic.
10 typeface choices˚ ❀˚ ༘♡
Discussing connotations✿⋆𓆉︎⚘°
1. VCR
The picture above is an example of how it'll look like if put in our project. I like this font because it's basically the font that a lot of found footage movies use, hence it is very commonly seen. It keeps the found footage style authentic. However, what I don't like about this font is how the font looks too old for a modern found footage film, so it doesn’t match the 2019 setting that we decided on. On its own, the font looks weird and might need vintage filters to make it feel more realistic. Without them, it could break the film’s uniqueness as a found footage.
2. Punktype
The picture above is how it'll look like if added into our video. The font looks glitchy and spooky, like a broken or haunted message. This makes it great for horror because it creates a feeling of fear and mystery. What I like about this font is that it looks handwritten, which is common in found footage horror. It makes it feel like it was really "found," making the movie more realistic. What I don’t like is that it looks too old for a modern setting like 2019. It doesn’t match the time and might look strange without vintage filters. The title card makes the movie feel real, like a police report or warning before something scary happens. Since it has no pictures or fancy effects, it looks unedited, like a real tape someone found. This makes the horror feel even more real and creepy.
Experiment☾𖤓
Title ideas
Opening text ideas
Reflectionʚɞ˚
Making this blog was really simple because I only had to add a little info to Kristine's work. This was an easy task because found footage doesn't really require much fonts and effects because that would destroy the illusion of realism. But this was challenging because not much found footage films have title cards or opening scenes. Luckily, as media evolved, more found footage films have been subverting this convention. Finding and choosing the fonts was easy for me because there was a feature in the dafont web where they had specific fonts for horror / typewriter.
This post explains how we showed a rough draft of our film opening to some members of our target audience in order to receive helpful feedback. This blog was made by me (Mai).
The purpose of a screen test is to gain audience feedback about our work and see if there are any improvements that can be made. We decided to use Google Forms to create a survey to share with our audience because it is very quick and easy to use for both me and the respondents.
Questions✿˖˚ ༘𐙚
1. What do you like about the video?
2. What improvements can be made?
3. What do you think of the effects so far? (sound, lighting, coloring, etc.)
4. If you rate it low, how do you think we can improve?
5. Mention 3 words to describe the cursed book.
6. Mention 3 words to describe Drew (the boy).
7. Would you watch the rest of the movie?
8. Which title is better?
Evaluation❀༄
We specifically chose these questions because we want to make sure that all of the elements and techniques we chose to implement into our opening scene successfully reaches and affects the audience correctly. At the same time, we are also making room for improvements by directly giving the respondents the freedom to express their opinions and thoughts. Furthermore, we chose these questions to further understand the extent of how immersed our respondents feel while watching the video, as it is one of our main goals (to make the audience feel like they're a part of the events).
We showed the clip to three members of our target audience to ensure that the feedback we receive is appropriate. Finding people for the screen test was easy, because we used social media (Instagram story) to spread the word and ask for volunteers. Thankfully, due to how quick social media connects us with other people, we got three different volunteers to help us out in no time.
Draft₊˚ʚ ᗢ
Results𖡼𖤣𖥧𖡼
Conclusion❀ஐ〰
From the feedback, we learned that our opening scene needs to have more prolonged suspense to make the events more intense and unpredictable. However, we also learned that we have successfully conveyed some of our messages to our audience. For instance, we've succeeded in making the cursed book seem creepy and unsettling. We can tell from the words our respondents selected when asked to describe them.
Since this is only a draft, there are many things missing in this opening scene. We are going to change some of the edits, because a respondent suggested to add more quick cuts involving black/blank screens. We will also change the coloring of the whole video, as it has been our plan from the start to make the opening scene seem more eerie. Lastly, as suggested by one of our respondents, we will also add more background music to help increase the thrill and suspense.
This screen test was a useful part of our process because it helps open our minds towards broader aspects that can help us improve our project. Opinions from different people are really important because it helps us think of things that we couldn't think of ourselves. By being open to feedback, we are exposed to constructive criticism and advices that will help us better our project.
Reflection✿⊰𖡼𖥧𖤣
As the editor of the group, this screen test made editing so much easier for me because all the extra steps are already laid out on this blog. All I have to do is just treat it like a to do list and complete all of the added tasks that our respondents advised us to do. This screen test also expanded our knowledge on which media codes (like hermaneutic codes) that can be further implemented in our project to improve the elements of horror. This is because we had a senior who also takes media studies as one of our respondents. As someone who is more experienced, she was able to provide us with feedbacks using media terms/language.
This blog contains details regarding the platforms that aided us in the process of making our film opening. The whole blog was made by Kellie, however I changed up the words a little bit.
Techs/apps used˚˖𓍢ִ໋❀
1. WhatsApp
Our main form of communication was through WhatsApp. We talked about multiple things, such as props, costumes, filming schedule, the location for our shoot and many more in the group Kristine made.
2. Camera App
Since we picked found footage horror as our genre, we used the camera app on my (Mai) iPhone instead of an advanced camera because we wanted to achieve that raw, realistic and unclear look. At first, we wanted to film using an old vintage camera, however no one owns one. Hence, we decided to settle with an iPhone. The film is meant to make the audience feel uneasy and uncomfortable, so with low quality footage and blurry filters that will be added later on in the editing process, this will help create that tone.
3. Photos App & Shared Album
Since we were using my (Mai) phone to film, we had a limited amount of storage to use. To fix this problem, as well as help fasten the process of compiling our footage and sharing behind the scene pictures later on, I (Mai) created a shared album in the photos app. All I (Mai) had to do was send an invite to Kellie, Kristine and Lamiya's numbers, which they will then accept. After accepting, we are all free to add pictures and videos into the album and refer to it whenever we need to.
4. CapCut
The editing app that I (Mai) decided to use is CapCut. It has a lot of helpful templates, filters and effects on it that really makes my editing process easier. I (Mai) am also familiar with it and have used it multiple times before, so choosing CapCut, which is an editing app I'm not new to makes editing easier for me as well.
5. Google Docs
A large part of our planning work was done on Google Docs. We used it for our script writing, filming schedule, statement of intent, location scout, risk assessment and our dominant reading. When we first started our planning for this project, a lot of our work in class were done in Google Docs. One thing I (Mai) like about Google Docs is that it auto saves our work, unlike Microsoft Word. Hence, these days I'd rather use Google Docs over anything else when it requires a lot of writing.
6. Google Forms
A part of our blogposts was to receive audience feedback, we decided to create a google form because we thought it would be the easiest and fastest way to collect it. It was also very convenient because Google Forms presents the responses in charts automatically, making it easier for us to analyze the results.
Reflection₊˚ʚᗢ₊
Creating this blog was quite easy because all I had to do was add onto the informations Kellie already added since she was mainly in charge of it. However, all I have to say about the tools and apps mentioned here is that they were all super easy to use because we've dealt with them countless times even outside media studies class. I hope that next time we can make use of them more.
This blog contains details of my editing process on CapCut. I was in charge of editing most of it, and Kristine helped me with adding additional effects. There are two sections to this blog, I (Mai) made this sections of the blog by myself, and the second section is by Kristine.
Software❀ᮬᰰུ
To begin with, I chose CapCut for this project because it is easy to use and has all the tools I need. It lets me add transitions, text, sound effects, and filters. Our opening scene needs a variety of effects and good audio, and CapCut makes that simple. It also lets me save my video in high quality without needing expensive software.
Introduction text• *₊°。
This is our first draft of our introduction text to our opening scene. We wanted to inform our audience about the occurrences before the footage was found. To do this, we included the date the teenagers were reported missing, how, and what happens next after a certain amount of time.
This is our final draft. There are some changes that I made. First of all, I changed the font of the text to "Creato Display". The reason for this is because we wanted to make our opening scene look a little more modern. Since the font we used before this was "Typewriter", it seemed really old and outdated, which didn't quite fit with our time line (2019).
Secondly, we decided to slightly change up the words and align them below each other (in one screen). We used shorter sentences to make it more intense and nerve wrecking. Each of the sentences appear in different time stamps, one after another.
This is how it turned out like. I'm really satisfied with the results. In my opinion, the "Jitter" effect I added played a big role in making the text look unsettling because it resembles flickering lights, which in general seems creepy. Additionally, the "Fade In" effect I added in the beginning of every sentence created a smooth entrance. The cherry on top is the static noise in the background. The best part about it is when it gradually gets louder and more distorted towards the end, building up suspense.
Turns out, Mr. Nick still had revisions that caused us to change certain things from our video. First of all, he suggested us to get rid of the "Jitter" effect. He commented that it looked unusual because all three sentences weren't 'jittering' at the same time, so he advised us to just completely get rid of it. Additionally, he also commented that the font we chose was too cliche. Therefore, he advised us to select any serif font of our choice. We decided to settle with a font called "Apple Garamond". I think it looks okay, I don't really know how to feel about it. It just looks more modern, and I do have to agree it feels more like 2019 with this font. This is the FINAL results of my part (without effects and filters yet).
Zoom ins & outs₊˚. 𐦍༘⋆
As shown in the video, I implemented some "Zoom In" and "Zoom Out" to make it clearer that the cameraman is using a camera to record the whole thing. It makes it feel more realistic. I did this manually in CapCut using keyframes.
The two white diamond shaped icons that I circled are called keyframes. These are what I used to create the "Zoom in" and "Zoom outs". How I did it:
1. Place a first keyframe on where I want the Zoom in/out to start
2. As shown in the picture on the right, I then click on the keyframe and adjust the position until I reach the Zoom in/out I want
3. Then I add another keyframe on where I want the Zoom in/out to end
4. Lastly, I click on the keyframe and adjust to return the position back to normal
Note: the reason why I did this manually instead of using the effects from CapCut is because I wanted to make it look more realistic. It looks more shaky and unstable when I did it myself, which is what I was looking for. Using the Zoom in/out effect from CapCut made it look too smooth.
Background noiseᗢ₊˚✧
In most found footage movies, we can hear a slight background noise that sounds like a blowing air conditioner. Sometimes, we can hear the noise very clearly, and it usually makes the movies seem more realistic. This is because the overall audio (of the characters talking, etc) is meant to sound unclear, unlike usual movies with good sound quality. An example of this is shown in the clip above from a found footage movie called "Paranormal Activity: The Ghost Dimension, 2015).
This is a little funny, but this was suggested by my friend, Gusde. To recreate that background noise, he suggested that I search up "air conditioner sound" on YouTube and use it as my background noise. I thought it was a really good idea so I did end up using it.
This was my opening scene before the background noise. If you pay attention, it sounded too quiet and silent.
Then, this is our opening scene with the background noise. As you can hear, it sounds a little noisier, which is what I was aiming for. I screen recorded a minute of the video from YouTube and extracted the sound to CapCut. Additionally, I did some adjustments to it (increased the volume and made it sound muffled). I really like how it turned out.
Knocking sound effect𑁍.ೃ࿔*:・
This is a YouTube video of a scary door knocking sound effect. Our plan was to layer the knocking sound for a more scarier and intense effect. We figured that if we tried making knocking sound effects on set (during shooting) it wouldn't sound very loud/creepy, so we decided to use a sound effect instead.
This is our video without the sound effect. We purposely did not manually make sound effects on set and had our actor (Lamiya) pretend that she heard a loud knocking sound and proceed to react to it.
This is our video with the sound effect. As you can hear, it definitely sounds like aggressive knocking because that's what we were trying to achieve. If the knocking sounded less angry, it wouldn't have felt scary/shocking. I made sure to increase the volume a little more from the original audio that I extracted from YouTube to make it sound even more frightening.
Extra music/audio𖤓 ⋆⁺₊
1.
This is a scene from the found footage horror movie "V/H/S 94". When watching this specific scene, me and Kristine thought the scary audio used for this scene sounded really good and that it would fit a certain scene in our video. Hence, I screen recorded this specific scene from the movie and extracted the audio to CapCut.
This is our video without the sound effect. Due to the knocking, the silence still did give off an eerie feeling, however it wasn't enough for me. After watching "V/H/S 94", it inspired me to use the same sound effect to make the moment of silence turn into something more bone-chilling.
This is our video after I added the audio. I really like how it turned out, because it made the scene even more eerie. I made sure to fade the audio out near the end so that it sounds smooth and natural.
2.
While editing our video, me and Kristine accidentally came across this audio when searching for another type of audio. Weirdly enough, despite what it is (wheezing/asthma sounds), it sounds really creepy, almost like a whale. That's when we came into an agreement that we can make use of this audio in a specific scene.
This is our video without the wheeze audio. As you can see, our actor (Lamiya), looks into the camera after realizing that something has touched her feet. I thought that we can make this scene more horrifying by adding a sound effect to emphasize her near danger/death.
This is our video with the wheeze audio. In my opinion, this is way better than our video without the audio. All I did was I screen recorded the YouTube video and extracted the audio into CapCut. I played with the volume a little bit to my liking so that it gives off the effect I was aiming for. I'm really happy with how it turned out, as it made this scene seem more unnerving.
3.
I found this sound effect from CapCut. I used this for the intro and outro text. The reason why I picked white noise specifically is because it reminds me of a broken radio. A broken radio has always sounded scary to me, so I decided to add it in the background as the texts show up.
4.
This is the last scene of our project, which is where Lyla gets dragged by the evil entity. On this part, I obviously thought that we needed an extra terrifying screaming scene to layer on top of our original clip to make it sound bone-chilling. Kristine helped me research and found a screaming audio that we both liked. She then screen recorded and sent it to me. This is a clip of our video without the audio layering. As you can hear, it sounds super awkward and ridiculous even.
This is the scene with the audio layering. As you can hear, it sounds so much scarier and almost ear piercing from how loud it is. I did this on purpose by extracting the audio from the screen recording Kristine gave and increasing the volume even more. I really liked how it turned out, as it transformed our actor's (Lamiya's) scream into something more creepy and unsettling, clearly showing that she's in big danger (about to die).
Black screen𑁍࿔̥̊
In this part, we aimed to create a hermeneutic code. This idea was suggested by Mr. Nick, where he advised us to show a black screen with the sound playing over it before it actually shows the clip. This is a form of hermeneutic code because it is meant to leave the audience questioning. "What's happening?" or something along those lines. How I did this:
1. Unlink the clip and the audio so that they separate
2. Adjust the audio with the black screen so that the timing is perfect by the time it shows the actual video
Title card⋆˚࿔
This is a rough draft of how our title card looks like in my part of editing, before adding in transitions and effects. Kristine will be in charge of that, however I was only in charge of adding the text and adjusting the timing. I managed to make the title card last for around 5-7 seconds, which was fortunately longer than expected. The font that I used for this is called "1942 report". I really like the scary and uneasy vibe it gives off.
Reflection𑁍ࠬܓ
Making this blog post took up so much of my time. However, I (Mai) did better than I did back when I first started media. As the editor of the group, you tend to have a lot of work lol.
This part of the blog was made by Kristine, I just copy and pasted.
After getting the clips from my team member (Maisie), I've decided to help with the glitch effects. I used an app called Video Star because it offers better features and more realistic effects than CapCut. Although the effects I will be using are paid, I have been using this application and its paid version since 2018. This application is only available on mobile phones so I had to edit the footage on my phone.
Video Star 𖤣.𖥧.𖡼.⚘
First I will introduce you the 3 youtube videos that I've used for sound effects and glitches.
The first thing that I did was to enhance the text introduction. I used 2 Video Star effects that helps create the mixture of chaos or threat from the jitter and build the eerie tension from the flickers.
Next I decided to start the found footage using the third Youtube link as a turn-on glitch effect. I used the Blend Background feature to blend both the glitch and footage making them look seamless together.
I used the Glitch D8 effect in Video Star because it looks more realistic and ensures it doesn't resemble the opening glitch. I also used the Jerky effect to enhance the laggy illusion, making the glitches feel more chaotic. I intensified the chaos to reflect the scene's context, where Drew Ditches a conversation because he didn't like how mature Lyla was acting. I also used the same Youtube link but looked for a quieter glitch audio to help intensify the glitch effect.
The next scene is the fake jump scare scene and where the glitches build up. I used the same method as before but chose a different audio to differentiate the glitches. I used the second youtube link that I added. But be cause I wanted to really intensify the scene, I increased the speed so the Jerky and the glitch was way more intense. The scene then cuts to a low-angle shot, and the glitches continue. I used the same method with Glitch D8 and Jerky to enhance the long "realism" take and maintain immersion.
There were also a few small glitches, where I combined Glitch D8 and used the this youtube link for glitch audio to enhance the error effect. Overall, the glitches were used to show the audience that this supernatural force is now taking control over the camera and them.
The big glitch in this scene had a lot of effects applied.
First, I added an additional glitch to enhance the overall effect, the more glitches the more intense it becomes. Then, I combines the first and third audio to create a more violent, eerie sound. I also added a shocking effect to make the scene feel more intense.
Even though it feels messy, I wanted the audience to experience a creepy, distorted audio that would make this sound unforgettable.
After all the glitches, we see the same glitch I used for the intense moment, but this time, it intensifies the pitch black screen rather than the scene itself. This makes the audience feel like they are merely watching something, reinforcing the idea that they are not actually int he situation creating a hermeneutic code for them. You also hear the audio of Carrie asking if Drew is okay.
We then get a small glimpse of Carrie since she told Lyla to hold the camera. I still used Glitch D8 and Jerky to intensify how serious the problem and the situation had become. I also used the same audio effects and intensified Glitch D8 combining it with the third Youtube link. This highlights the similarities between what Carrie and Drew encountered, the mysterious sound and glitches
Using the same technique with a small glitch effect and the same audio form the third YouTube link, the scenes shifts to Lyla on the floor desperately searching for the camera as its her last hope.
Then, I used the same Glitch A2 effect combines with a pitch black screen after the screaming scene to conclude the found footage scene. This keeps the intensity high as if the scene felt like a pure relief, viewers might stop watching. But with a sudden blackout, it creates a hermeneutic code, making them question what just happened and keeping them engaged.
In the end, I used a non-diegetic sound to enhance the intensity of the text title with this audio. I used sound: ROOM 237.WAV
I decide dot add a zoom-in effect where the text moves closer, further intensifying the ending. This not only builds tension but also leaves viewers with more questions about the book and what actually happened, drawing deeper into the mystery.
After getting approval by my teacher, I continued the next step which was colouring. I used 3 different tools to help with my colouring. They also carry meaning that enhances the overall indeed message.
The Vignette Pro effect helps enhance the darkness of the scene while creating the illusion of an eye shape, reinforcing the idea that we we seeing things from a specific point of view, This detail adds to the immersive experience, making the moment feel more personal and intense,
The Gloom colour plays a role in bringing the wood texture to life, making it appear richer and more detailed, since the attic is a part of this storyline. This is not only added depths to the visual but also strengthens the atmosphere akin the setting feel more real and engaging for the audience.
The sharpening effect helps emphasise key details, making them standout with a crisp, serious tone. This effects heighten the intensity of the scene, drawing viewers into the unsettling atmosphere. I also applied sharpening to the text, further to ensure that its message is felt as mush as it it seen.
Reflection❀࿐
I was struggling because I finished editing my product 2 days before this was told to be finished by my teacher. I had to stay up all night to do this and didn't go to school on the due date. Im glad that I didnt have to do the whole blog because part of this was done by my team memebr (Maisie). So it was also easier for me to get things done. (THIS IS KRISTINE'S REFLECTION THAT I COPY PASTED).
This blog contains information and clips of our behind the scenes, outlining our process of filming. Lamiya was supposed to be in charge of this blog, but I really wanted to get some sleep and she wasn't finished with her task so I decided to do it on my own.
Roles୭ ˚. ᵎᵎ
Drew - Panji Wiradharma
Lyla - Lamiya Zara
Carrie - Kellie Collins
Behind the scenes𓏲*ੈ
Preparing props
These are pictures of me, Kellie and Kristine decorating my book using the supplies Kristine had at her house. I brought the masking tape from home, but the rest of the products were Kristine's. We wanted to make the book look older and creepier by using pigments from Kristine's eyeshadow palettes and brushes. Surprisingly, it worked really well.
On the way
These are pictures of me, Kellie and Kristine on our way to the shooting location. The rest of the crew were on their way on a separate car.
Shooting
These are some behind the scenes pictures of us that our friend Arnold took when we were filming our main scenes in the attic. It was extremely hot up there and we were all sweating. However, we still got the job done in just one filming session.
Reflection𓅪
Making this blog was really easy because we made sure to take as many pictures as possible during the day of our filming session. We compiled these pictures into a shared album so they would be easy to find. I'm proud of my team for coming to the set super prepared, so there weren't any major complications that occurred during filming. Next time, we'll make sure to bring a fan just in case we're going to deal with another tight, hot space like this again.